Mounted in under 60 seconds
No wiring, no drilling, no tools. Eight steps from box to beam — follow along with the illustrated panels below.
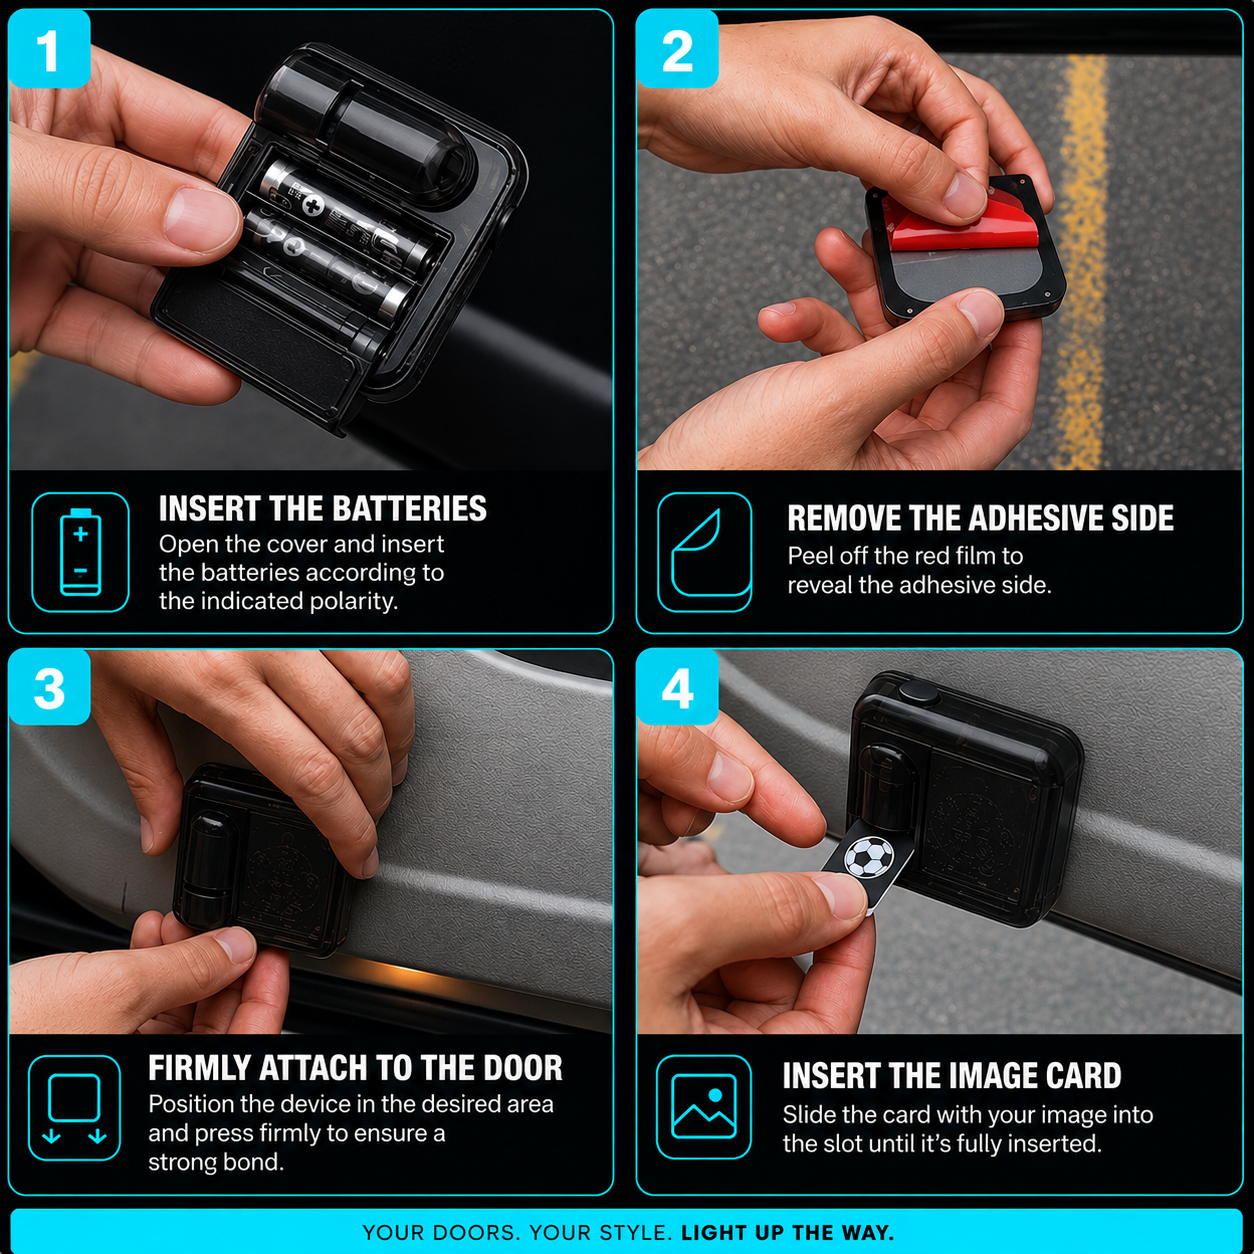
- 01
Pop in 3 AAA batteries on the back of the unit.
- 02
Peel the adhesive backing off the mounting pad.
- 03
Attach the projector to the underside of your door.
- 04
Slide in the crest card for your club or custom logo.
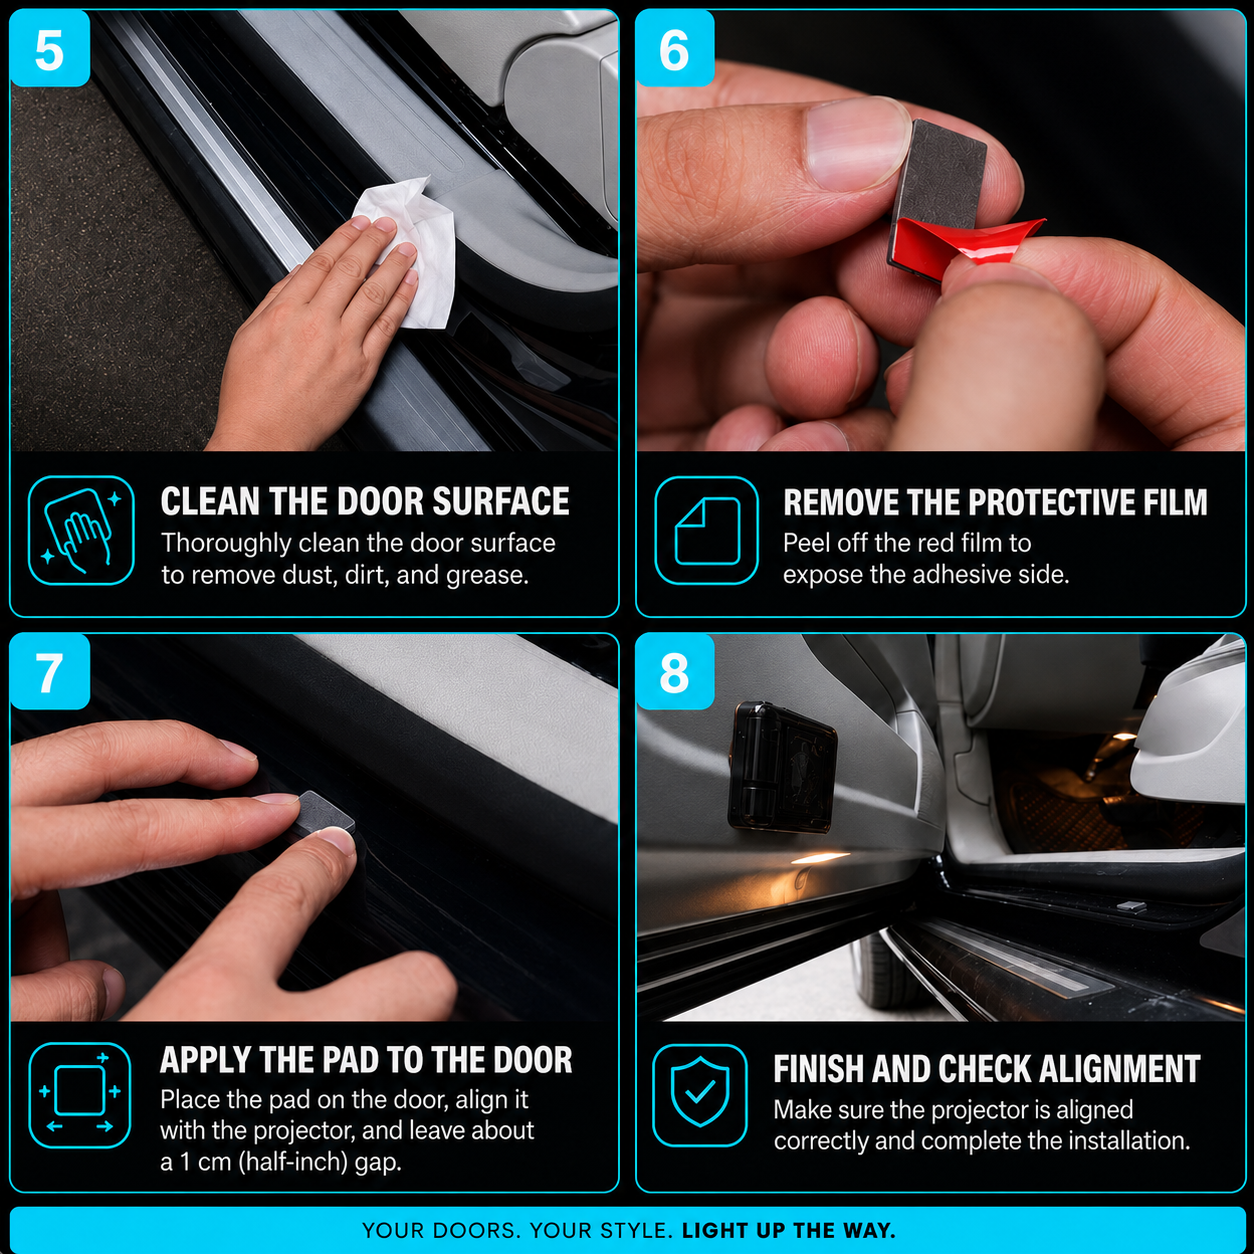
- 05
Clean the door surface so the pad bonds properly.
- 06
Remove the protective film from the lens.
- 07
Press the pad firmly for 30 seconds.
- 08
Open the door and check the projection alignment.